如何入手一台已开源的遥控系统(Code)(下)
 0
0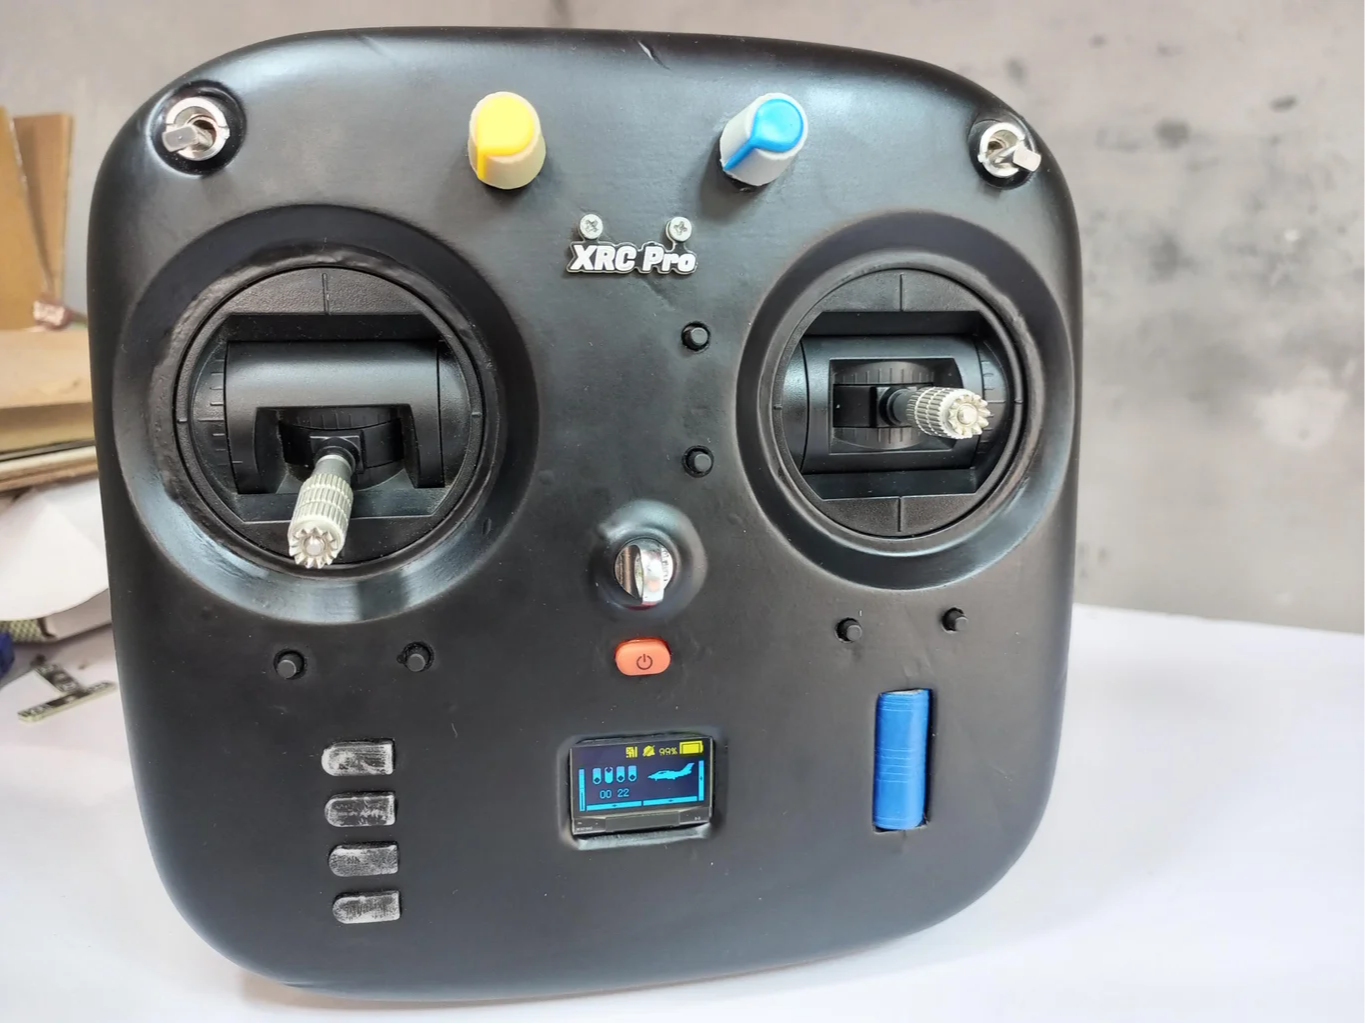
准备工作:
材料:
发射器组件 | ||
材料 | 数量 | 备注 |
STM32F103C8T6 | 1 | / |
NRF24L01 GT24 迷你版 | 1 | / |
E11 旋转编码器 (ENC) | 1 | / |
贴片 8MHz 晶振 (3225) | 1 | / |
FC-135 32.768kHz 晶体 | 1 | / |
CH340C 贴片机 | 1 | / |
Y1 (8050) NPN 晶体管 | 2 | / |
1AM (3904) NPN 晶体管 | 1 | / |
0.96 英寸 OLED 显示屏 | 1 | / |
10k 欧姆电阻器 (SMD) | 4 | / |
1k 欧姆电阻器 (SMD) | 4 | / |
100nF 电容器 (SMD) | 20 | / |
蜂鸣器 | 1 | / |
AMS117 (3.3V 稳压器) | 1 | / |
10uF 电容器 | 2 | / |
公接头 | 30 | / |
DJI Phantom 2 遥控器外壳 | 1 | / |
接收器 (PWM+PPM) | ||
材料 | 数量 | 备注 |
1.STM32F103C8T6 | 1 | / |
2.NRF24L01 GT24 Mini | 1 | / |
3.SMD 8MHz 晶体 (3225) | 1 | / |
4.1AM (3904) NPN 晶体管 | 1 | / |
5.AMS117 (3.3V 稳压器) | 1 | / |
6.10uF 电容器 | 2 | / |
7.100nF 电容器 (SMD) | 4 | / |
8.公接头 | 30 | / |
接收器 (PPM+SBUS) | ||
材料 | 数量 | 备注 |
1.STM32F103C8T6 | 1 | / |
2.NRF24L01 GT24 Mini | 1 | / |
3.SMD 8MHz 晶体 (3225) | 1 | / |
4.1AM (3904) NPN 晶体管 | 1 | / |
5.AMS117 (3.3V 稳压器) | 1 | / |
6.10uF 电容器 | 2 | / |
7.100nF 电容器 (SMD) | 4 | / |
8.公接头 | 30 | / |
setup()

此功能初始化所有必要的硬件外围设备并设置系统运行。
loop()

在运行期间持续运行的主循环。它处理显示更新、信号强度检查和关键事件。
keyEventHandle()

通过按键处理用户输入。此函数更新节流设置并处理菜单中的导航。
addSignalStrengthSa

将新样本添加到信号强度缓冲区中,并保持信号强度的移动平均值。
getAverageSignalStr

根据收集的样本计算信号强度的移动平均值。
displaySignalIcon()

根据信号强度百分比在 OLED 上显示信号强度图标。
nrf24l01InitAndCheck

初始化 NRF24L01 模块并将其设置为传输模式。
Sending Data Packets

该函数创建一个 32 字节的数据包,并使用 NRF24L01 模块发送。数据包包含数据头和通道值 (PWM 数据)。
getSignalStrength()

此函数通过发送多个数据包并计算成功传输的百分比来测量信号强度。
updateSignalStrength

更新信号强度显示并检查接收器是否已连接。它还会将新样本添加到信号强度缓冲区中。
menuEventHandle()

处理用户界面菜单并响应用户输入以更改设置。
Battery Voltage

根据电池电压更新 OLED 上的电池电量图标和百分比。
Clock and Alarm

处理时钟和闹钟功能,触发闹钟时发出蜂鸣声。

步骤

将 USB 串行转换器插入 PC。按下 STM32 板上的重置按钮。在软件中选择 COM 端口。单击“下一步”、“下一步”和“下一步”。选择“下载到设备”。单击 3 个点并选择十六进制文件。选择 Global Erase.然后单击下一步在 15 秒内,代码将上传到设备。在完成 finsihed.单击 Close。
 0
0 0
0 0
0 qq空间
qq空间  微博
微博  复制链接
复制链接