MediaPipe + OpenCV 实现 隔空手势鼠标
 0
0 0
0 0
0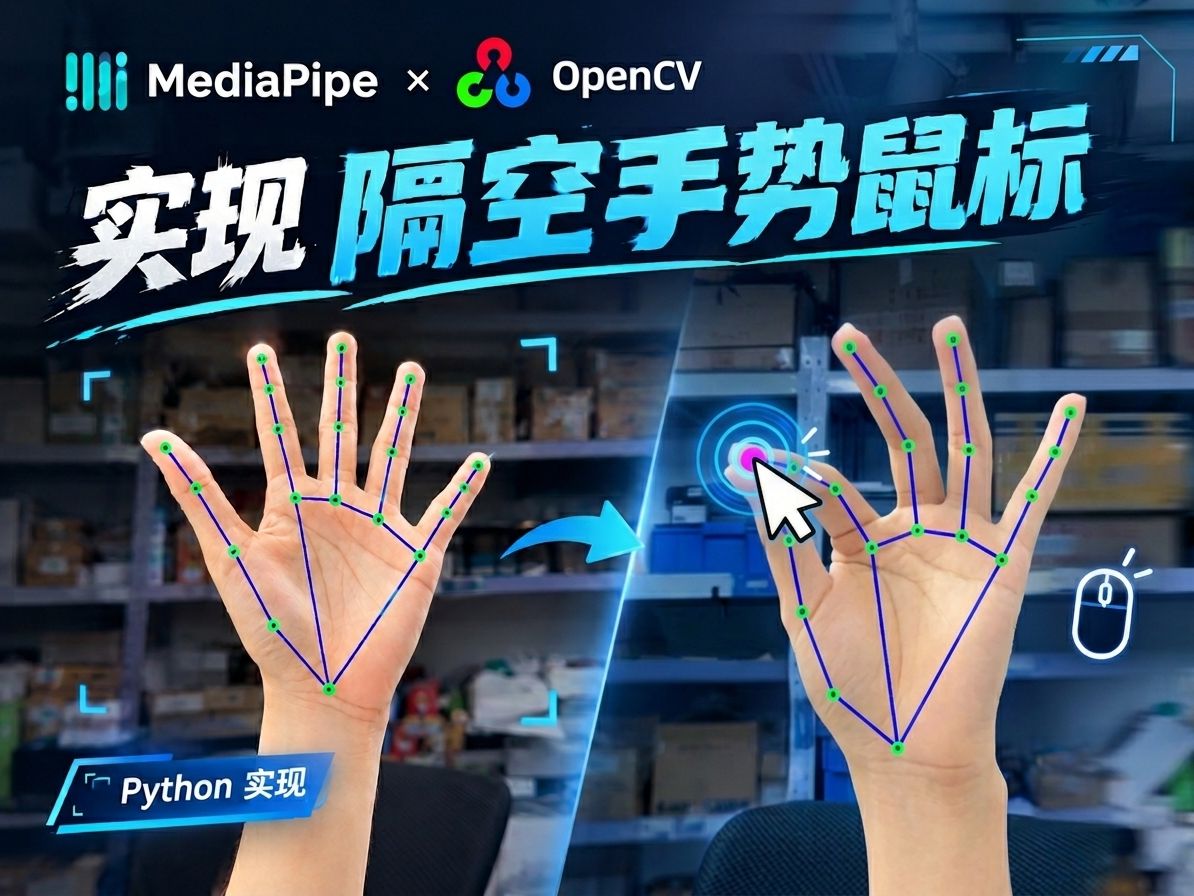
利用摄像头实时捕捉手部动作,通过 MediaPipe 识别手部关键点,再结合 OpenCV 对摄像头画面进行处理,获取食指、拇指等关键位置,并使用 PyAutoGUI 将手指动作转换为电脑鼠标操作。通过食指移动控制鼠标移动,通过拇指与食指捏合模拟鼠标左键点击,从摄像头画面到手势识别,再到实际鼠标控制,新手小白也可以学会。
1
安装依赖
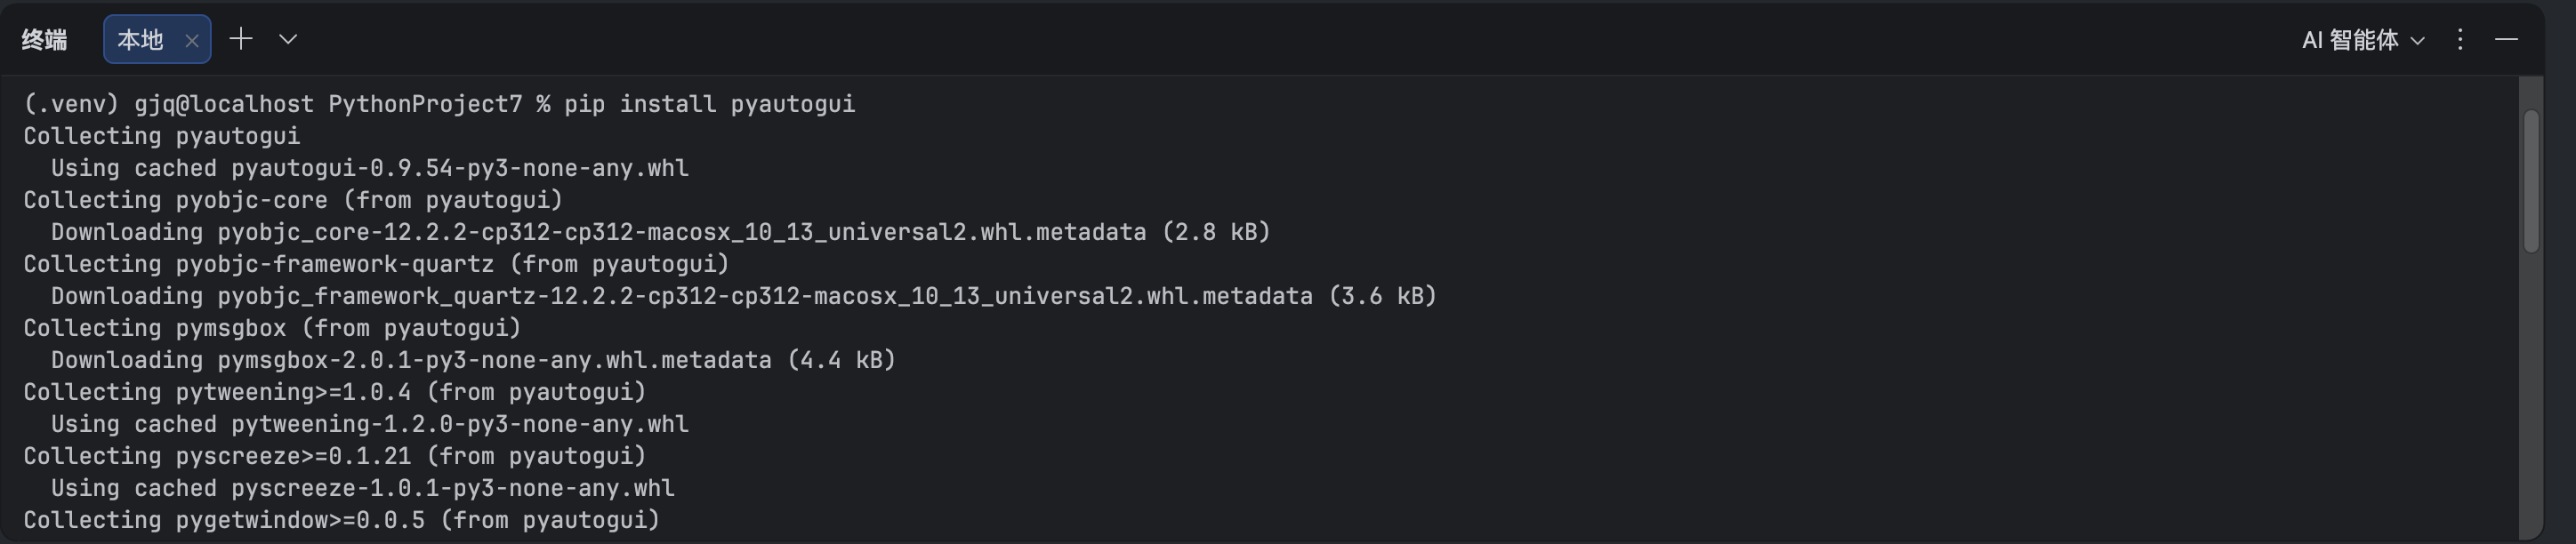
输入以下命令 进行安装基础依赖
pip install opencv-python mediapipe pyautogui
- opencv-python:打开摄像头、读取视频画面和绘制图像。
- mediapipe:识别手部关键点,获取食指和拇指的位置。
- pyautogui:控制电脑鼠标移动和执行点击操作。
2
打开摄像头并获取画面
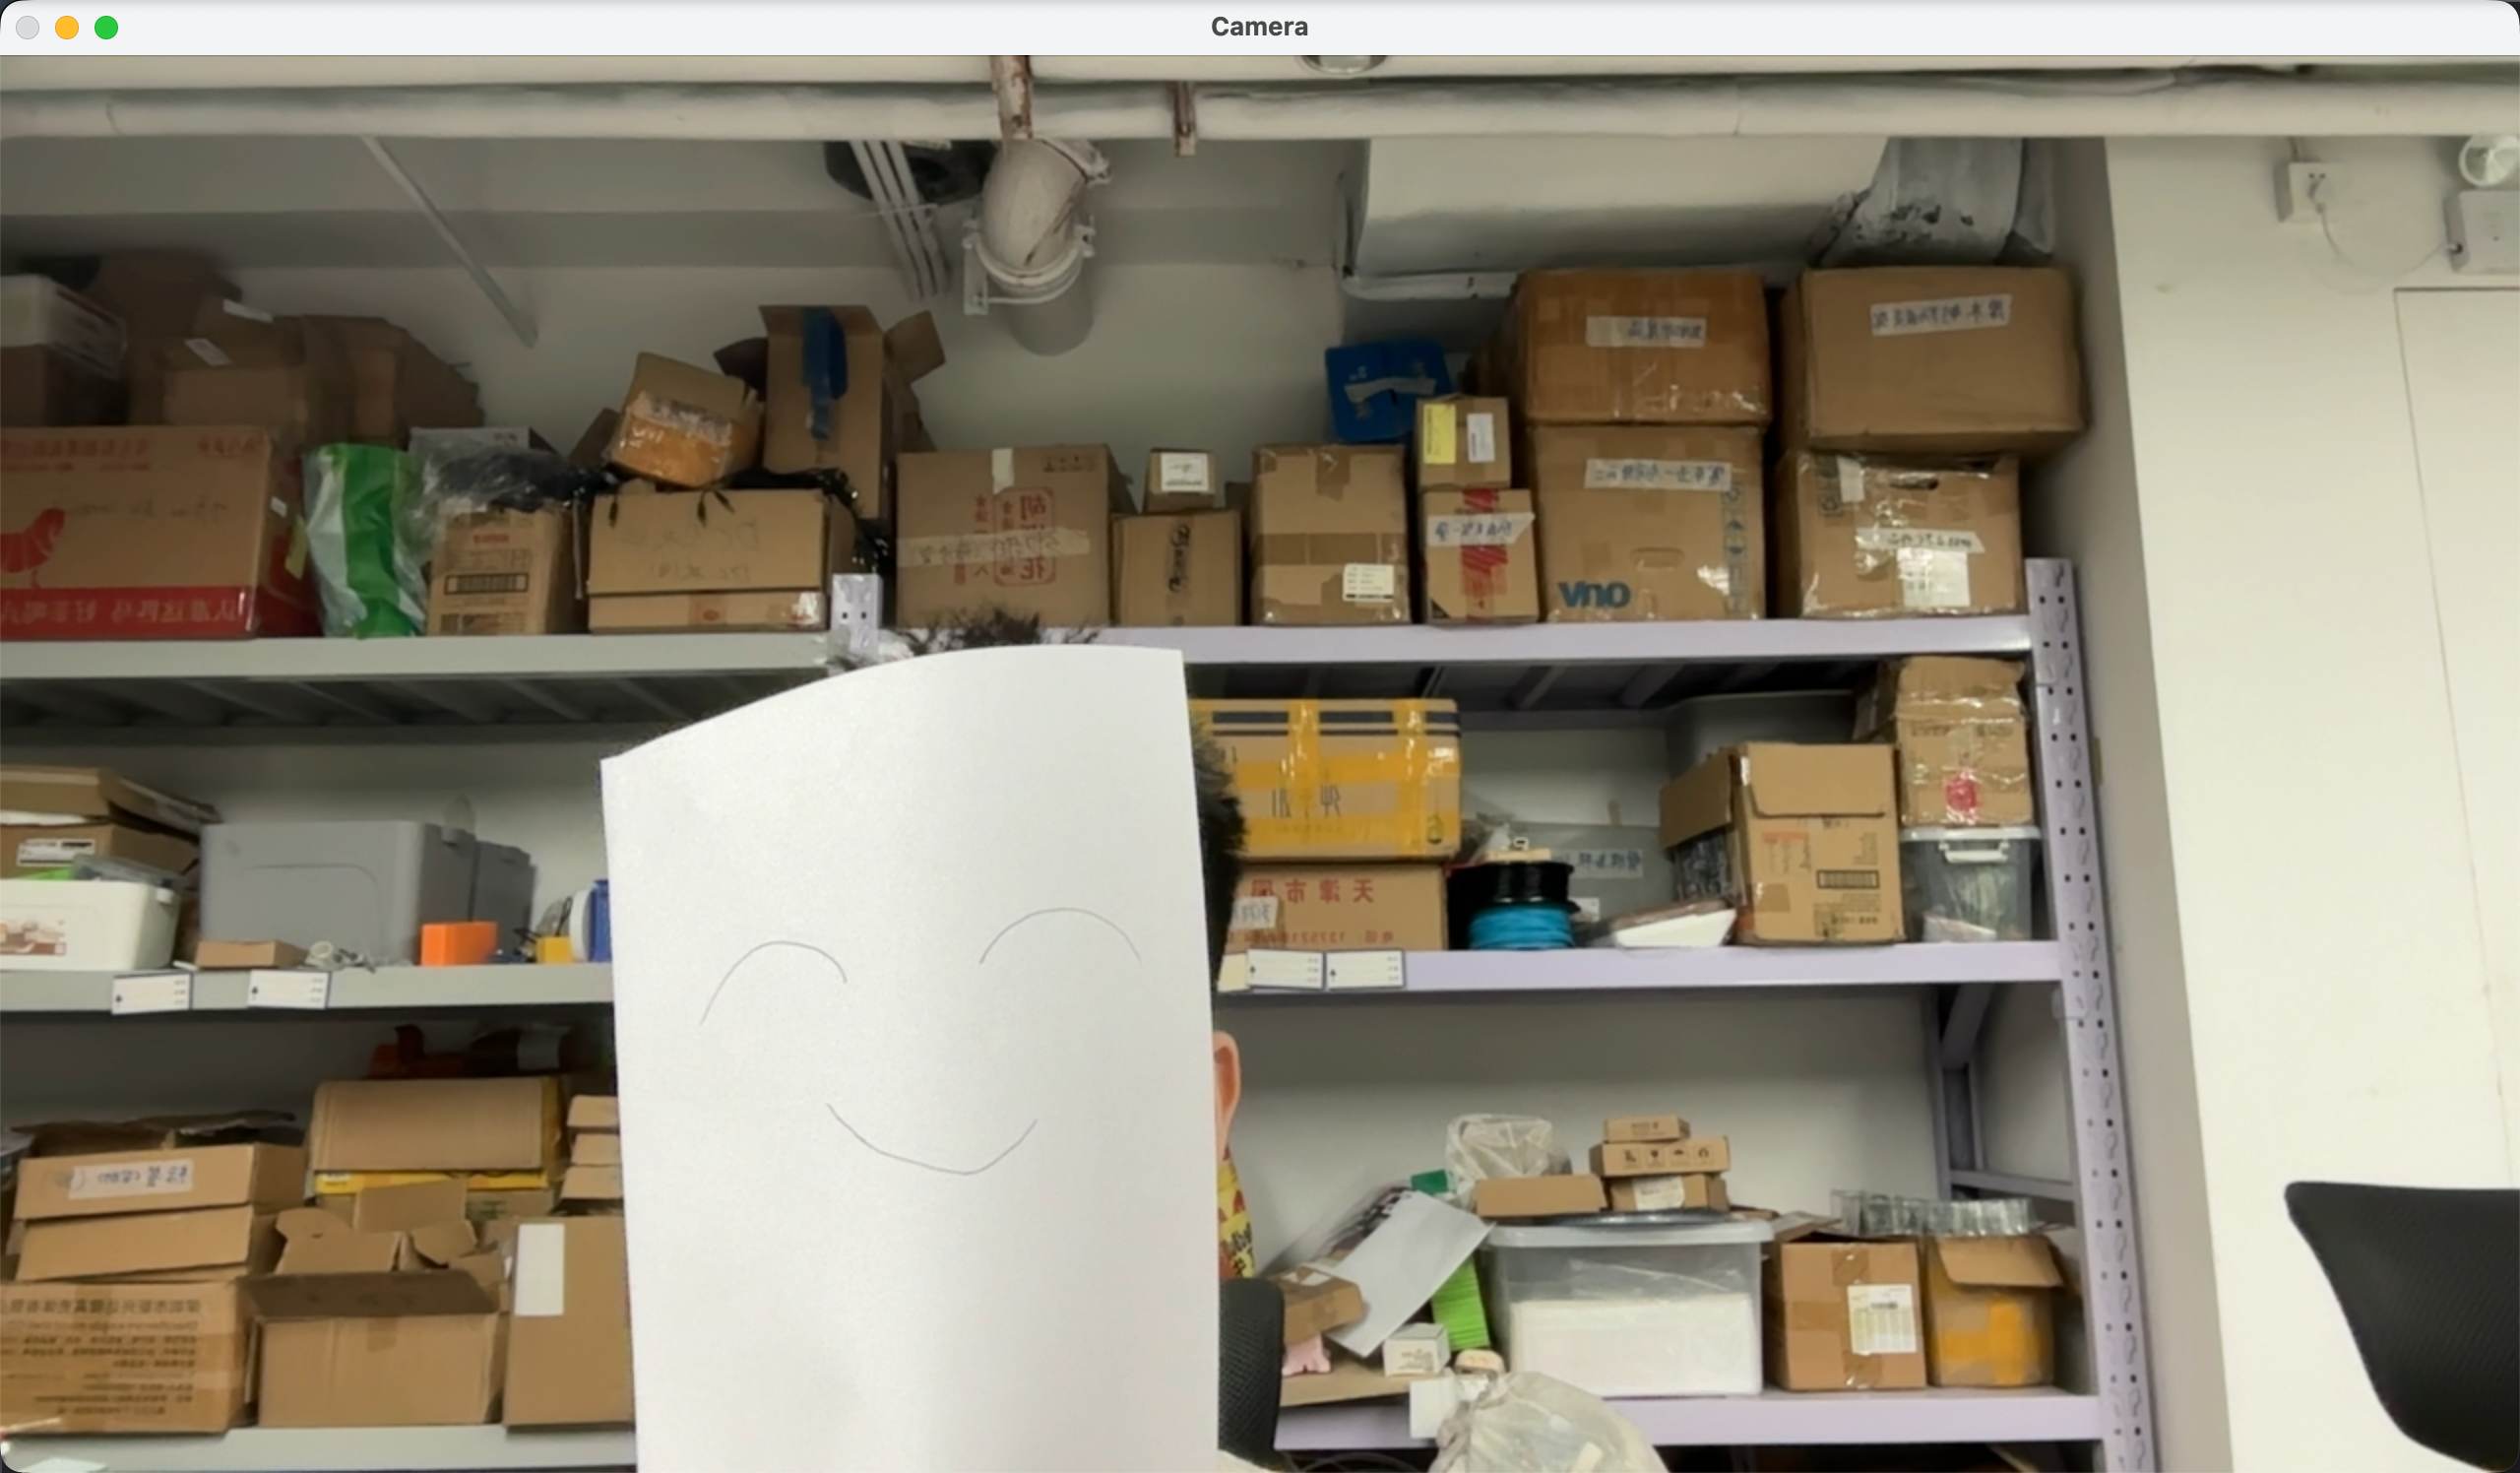
先使用 OpenCV 打开电脑摄像头,然后循环读取摄像头画面,并将画面显示出来。
分辨率 为1280 * 720 大家自由设置
import cv2
# ---------------------- 打开摄像头 ----------------------
# 打开默认摄像头
cap = cv2.VideoCapture(0)
# 设置摄像头分辨率
cap.set(cv2.CAP_PROP_FRAME_WIDTH, 1280)
cap.set(cv2.CAP_PROP_FRAME_HEIGHT, 720)
# 检查摄像头是否打开成功
if not cap.isOpened():
print("错误:无法打开摄像头!")
exit()
print("摄像头已启动")
print("按 q 键退出")
# ---------------------- 读取摄像头画面 ----------------------
while cap.isOpened():
# 读取一帧画面
ret, frame = cap.read()
if not ret:
print("警告:无法读取摄像头画面")
break
# 镜像显示
frame = cv2.flip(frame, 1)
# 显示摄像头画面
cv2.imshow(
"Camera",
frame
)
# 按 q 键退出
if cv2.waitKey(1) & 0xFF == ord("q"):
break
# ---------------------- 释放摄像头 ----------------------
cap.release()
cv2.destroyAllWindows()
print("摄像头已关闭")
3
识别手部
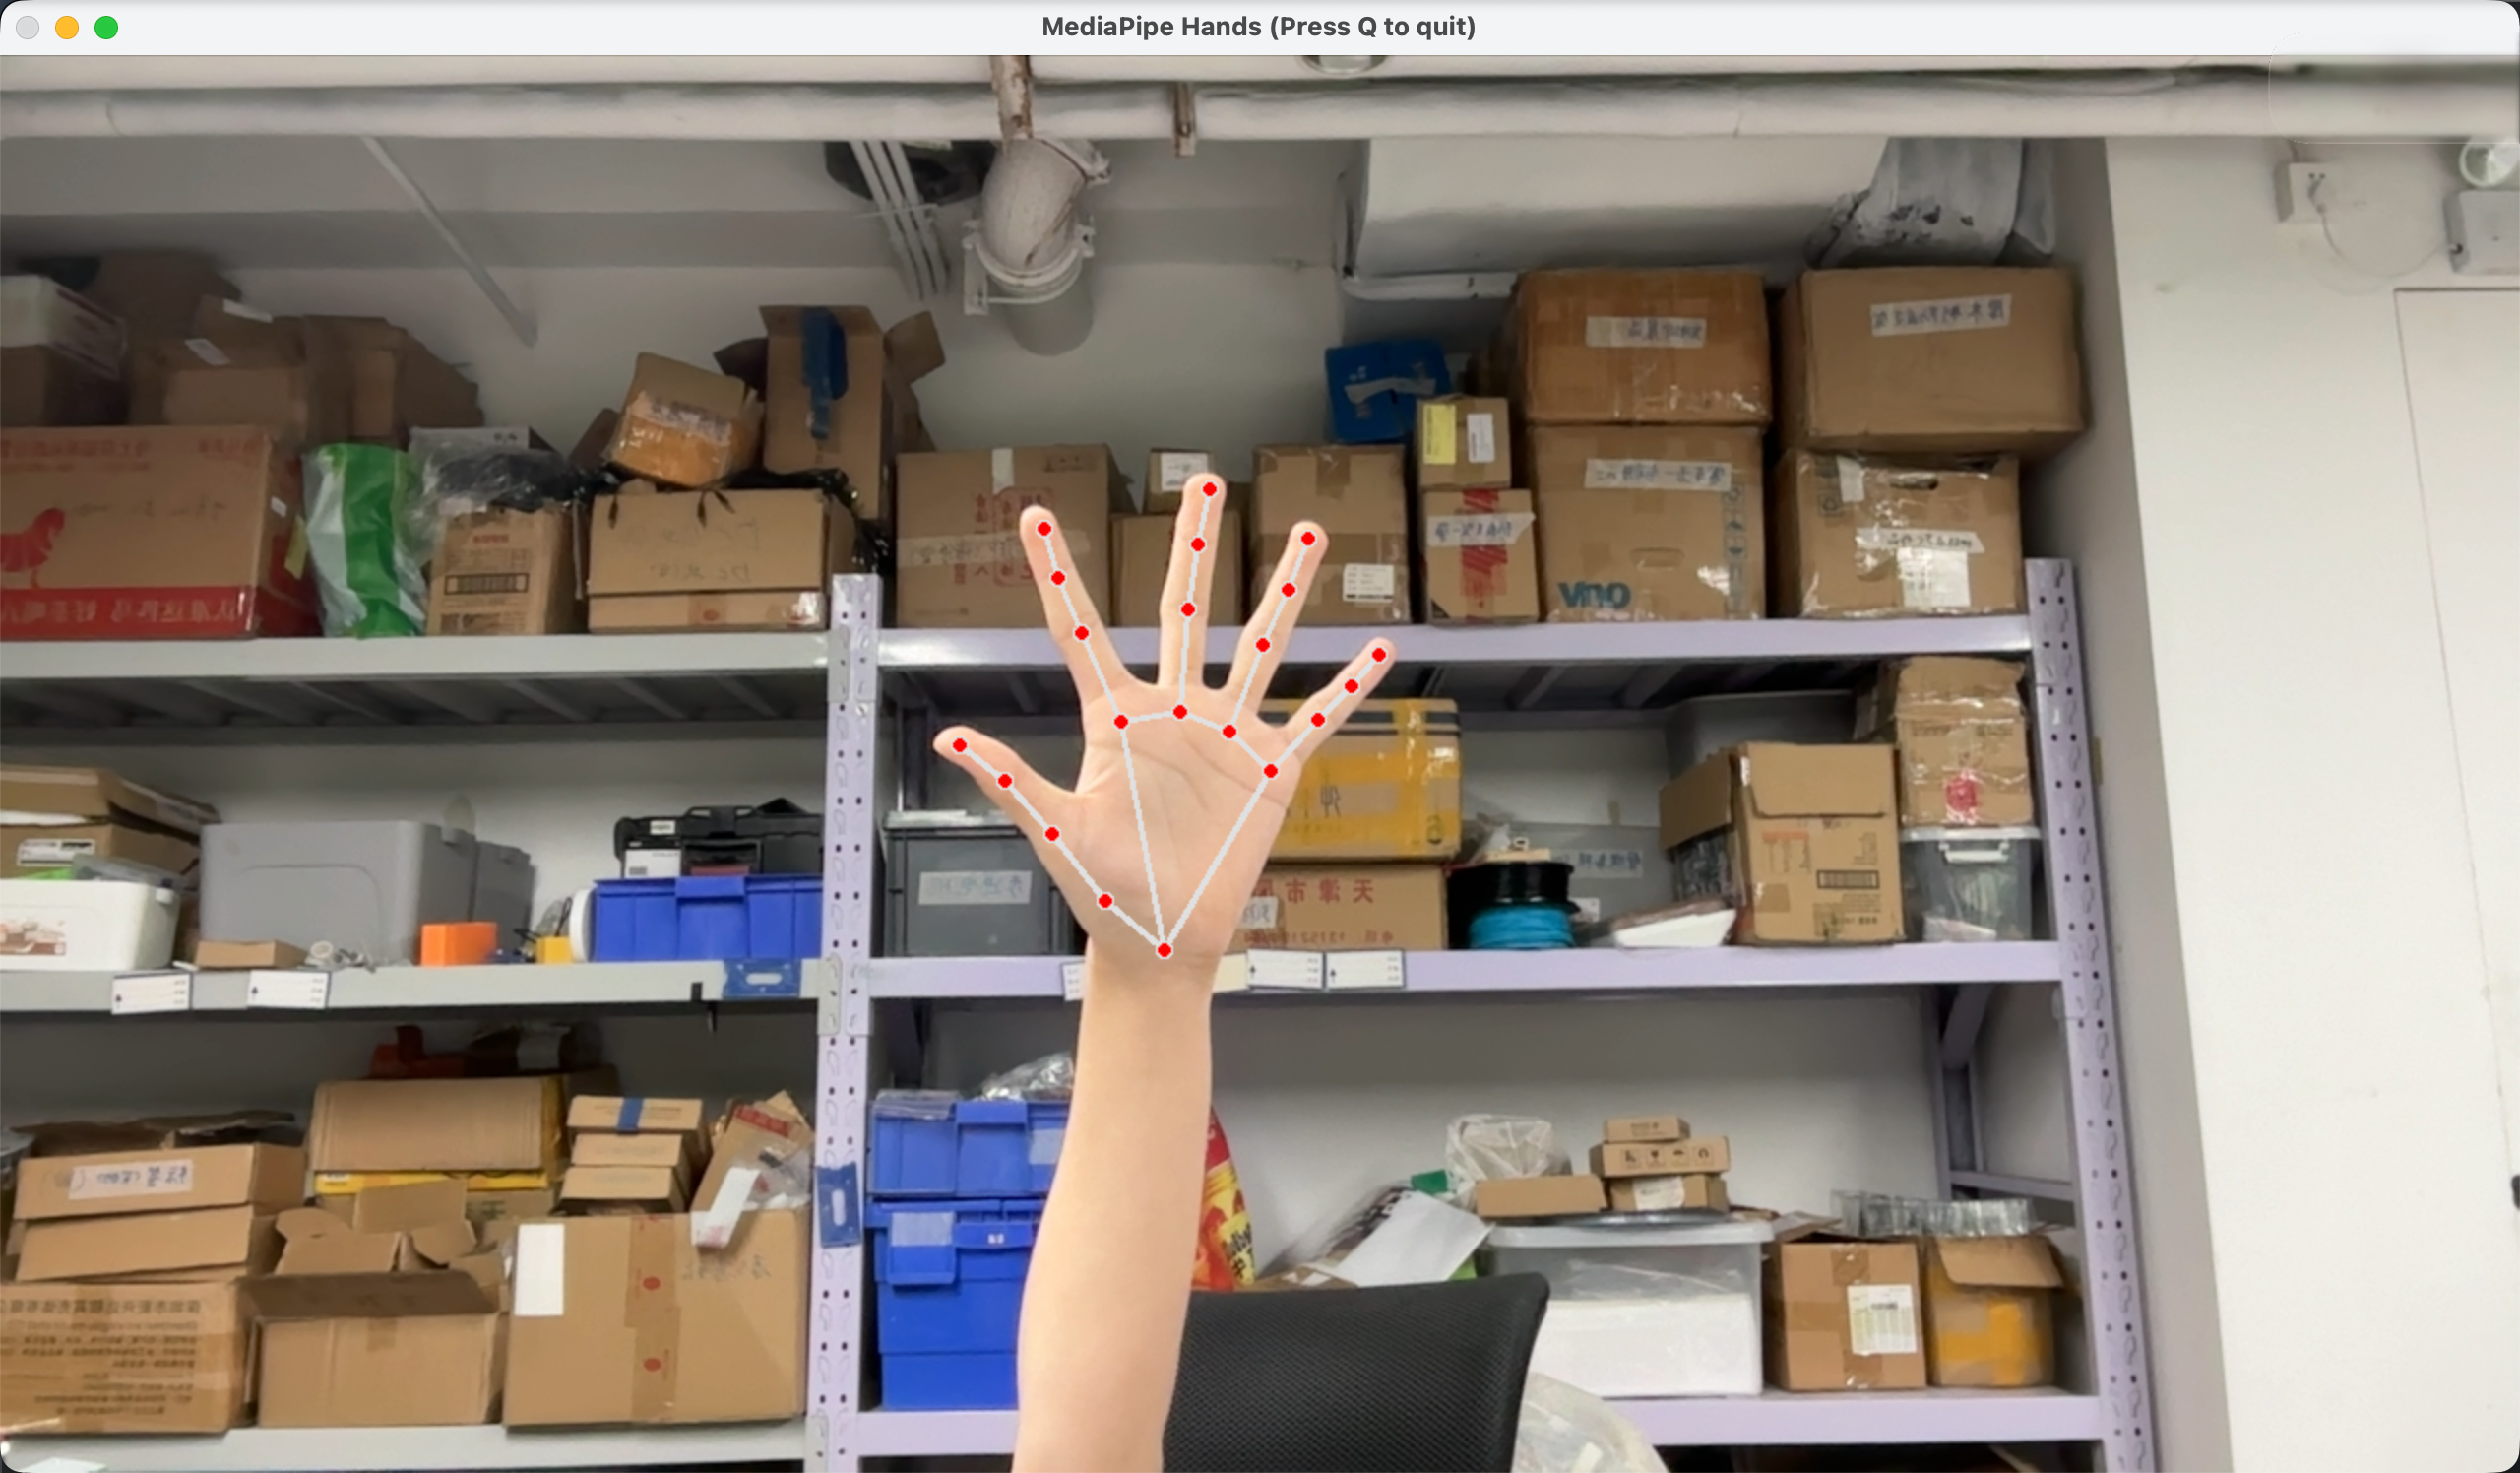
核心代码其实就是 MediaPipe 会分析摄像头当前这一帧画面。如果检测到了手就可以获得这只手的 21 个关键点。把这些关键点和手指之间的连接线绘制到摄像头画面上。
import cv2
import mediapipe as mp
# ---------------------- 初始化 MediaPipe Hands ----------------------
mp_hands = mp.solutions.hands
hands = mp_hands.Hands(
static_image_mode=False,
max_num_hands=1,
min_detection_confidence=0.7,
min_tracking_confidence=0.5
)
# 初始化绘图工具
mp_drawing = mp.solutions.drawing_utils
# ---------------------- 打开摄像头 ----------------------
cap = cv2.VideoCapture(0)
cap.set(cv2.CAP_PROP_FRAME_WIDTH, 1280)
cap.set(cv2.CAP_PROP_FRAME_HEIGHT, 720)
if not cap.isOpened():
print("错误:无法打开摄像头!")
exit()
print("手部识别已启动")
print("按 q 键退出")
# ---------------------- 识别手部 ----------------------
while cap.isOpened():
# 读取摄像头画面
ret, frame = cap.read()
if not ret:
print("警告:无法读取摄像头画面")
break
# 镜像显示
frame = cv2.flip(frame, 1)
# BGR 转 RGB
frame_rgb = cv2.cvtColor(
frame,
cv2.COLOR_BGR2RGB
)
# 进行手部识别
results = hands.process(frame_rgb)
# 判断是否检测到手
if results.multi_hand_landmarks:
# 获取第一只手
hand_landmarks = results.multi_hand_landmarks[0]
# 绘制手部关键点和连接线
mp_drawing.draw_landmarks(
frame,
hand_landmarks,
mp_hands.HAND_CONNECTIONS
)
# 显示画面
cv2.imshow(
"MediaPipe Hands (Press Q to quit)",
frame
)
# 按 q 键退出
if cv2.waitKey(1) & 0xFF == ord("q"):
break
# ---------------------- 释放资源 ----------------------
cap.release()
cv2.destroyAllWindows()
hands.close()
print("程序已退出")
4
指尖坐标
完成手部识别后,下一步需要从 MediaPipe 提供的 21 个手部关键点中找到食指指尖的位置。MediaPipe 使用归一化坐标表示关键点位置,还需要结合摄像头画面的宽度和高度,将它转换成实际的像素坐标 也就是xy。
这样,我们就能够实时获取食指在摄像头画面中的位置 代码如下 效果看视频
import cv2
import mediapipe as mp
# ---------------------- 初始化 MediaPipe Hands ----------------------
mp_hands = mp.solutions.hands
hands = mp_hands.Hands(
static_image_mode=False,
max_num_hands=1,
min_detection_confidence=0.7,
min_tracking_confidence=0.5
)
mp_drawing = mp.solutions.drawing_utils
# ---------------------- 打开摄像头 ----------------------
cap = cv2.VideoCapture(0)
cap.set(cv2.CAP_PROP_FRAME_WIDTH, 1280)
cap.set(cv2.CAP_PROP_FRAME_HEIGHT, 720)
if not cap.isOpened():
print("错误:无法打开摄像头!")
exit()
print("手部识别已启动")
print("移动食指查看指尖坐标")
print("按 q 键退出")
# ---------------------- 获取食指位置 ----------------------
while cap.isOpened():
# 读取摄像头画面
ret, frame = cap.read()
if not ret:
print("警告:无法读取摄像头画面")
break
# 镜像显示
frame = cv2.flip(frame, 1)
# BGR 转 RGB
frame_rgb = cv2.cvtColor(
frame,
cv2.COLOR_BGR2RGB
)
# 手部识别
results = hands.process(frame_rgb)
# 获取画面尺寸
height, width = frame.shape[:2]
if results.multi_hand_landmarks:
# 获取第一只手
hand_landmarks = results.multi_hand_landmarks[0]
# 绘制手部关键点
mp_drawing.draw_landmarks(
frame,
hand_landmarks,
mp_hands.HAND_CONNECTIONS
)
# 获取食指指尖
index_finger = hand_landmarks.landmark[
mp_hands.HandLandmark.INDEX_FINGER_TIP
]
# MediaPipe 坐标转换成像素坐标
index_x = int(index_finger.x * width)
index_y = int(index_finger.y * height)
# 在食指指尖位置绘制圆点
cv2.circle(
frame,
(index_x, index_y),
10,
(255, 0, 255),
-1
)
# 显示坐标
cv2.putText(
frame,
f"X: {index_x} Y: {index_y}",
(20, 40),
cv2.FONT_HERSHEY_SIMPLEX,
0.8,
(0, 255, 0),
2
)
# 显示摄像头画面
cv2.imshow(
"MediaPipe Hands (Press Q to quit)",
frame
)
# 按 q 键退出
if cv2.waitKey(1) & 0xFF == ord("q"):
break
# ---------------------- 释放资源 ----------------------
cap.release()
cv2.destroyAllWindows()
hands.close()
print("程序已退出")
5
指尖鼠标
把这个坐标转换成电脑屏幕坐标。通过 pyautogui.size() 获取屏幕尺寸,再将 MediaPipe 的归一化坐标映射到整个屏幕,最后使用 pyautogui.moveTo() 控制鼠标跟随食指移动。 代码如下 效果看视频
这一步,隔空鼠标的移动功能就完成了
import cv2
import mediapipe as mp
import pyautogui
# ---------------------- 初始化 MediaPipe Hands ----------------------
mp_hands = mp.solutions.hands
hands = mp_hands.Hands(
static_image_mode=False,
max_num_hands=1,
min_detection_confidence=0.7,
min_tracking_confidence=0.5
)
mp_drawing = mp.solutions.drawing_utils
# ---------------------- 获取屏幕尺寸 ----------------------
screen_width, screen_height = pyautogui.size()
# ---------------------- 鼠标平滑参数 ----------------------
smooth = 0.25
smooth_x = 0
smooth_y = 0
first_move = True
# ---------------------- 打开摄像头 ----------------------
cap = cv2.VideoCapture(0)
cap.set(cv2.CAP_PROP_FRAME_WIDTH, 1280)
cap.set(cv2.CAP_PROP_FRAME_HEIGHT, 720)
if not cap.isOpened():
print("错误:无法打开摄像头!")
exit()
print("隔空鼠标已启动")
print("移动食指控制鼠标")
print("按 q 键退出")
# ---------------------- 控制鼠标移动 ----------------------
while cap.isOpened():
# 读取摄像头画面
ret, frame = cap.read()
if not ret:
print("警告:无法读取摄像头画面")
break
# 镜像显示
frame = cv2.flip(frame, 1)
# BGR 转 RGB
frame_rgb = cv2.cvtColor(
frame,
cv2.COLOR_BGR2RGB
)
# 手部识别
results = hands.process(frame_rgb)
height, width = frame.shape[:2]
if results.multi_hand_landmarks:
# 获取第一只手
hand_landmarks = results.multi_hand_landmarks[0]
# 绘制手部关键点
mp_drawing.draw_landmarks(
frame,
hand_landmarks,
mp_hands.HAND_CONNECTIONS
)
# ----------------------
# 获取食指指尖
# ----------------------
index_finger = hand_landmarks.landmark[
mp_hands.HandLandmark.INDEX_FINGER_TIP
]
# 摄像头坐标
index_x = int(index_finger.x * width)
index_y = int(index_finger.y * height)
# 绘制食指指尖
cv2.circle(
frame,
(index_x, index_y),
10,
(255, 0, 255),
-1
)
# ----------------------
# 映射到屏幕坐标
# ----------------------
target_x = int(
index_finger.x * screen_width
)
target_y = int(
index_finger.y * screen_height
)
# 限制屏幕范围
target_x = max(
0,
min(screen_width - 1, target_x)
)
target_y = max(
0,
min(screen_height - 1, target_y)
)
# ----------------------
# 平滑鼠标移动
# ----------------------
if first_move:
smooth_x = target_x
smooth_y = target_y
first_move = False
else:
smooth_x += (
target_x - smooth_x
) * smooth
smooth_y += (
target_y - smooth_y
) * smooth
# 移动鼠标
pyautogui.moveTo(
int(smooth_x),
int(smooth_y),
duration=0
)
# 显示屏幕坐标
cv2.putText(
frame,
f"Mouse: ({int(smooth_x)}, {int(smooth_y)})",
(20, 40),
cv2.FONT_HERSHEY_SIMPLEX,
0.7,
(0, 255, 0),
2
)
else:
# 没有检测到手时,重新初始化鼠标位置
first_move = True
cv2.putText(
frame,
"No hand detected",
(20, 40),
cv2.FONT_HERSHEY_SIMPLEX,
0.8,
(0, 0, 255),
2
)
# 显示画面
cv2.imshow(
"Air Mouse (Press Q to quit)",
frame
)
# 按 q 键退出
if cv2.waitKey(1) & 0xFF == ord("q"):
break
# ---------------------- 释放资源 ----------------------
cap.release()
cv2.destroyAllWindows()
hands.close()
print("程序已退出")
6
鼠标点击效果
这里使用 MediaPipe 获取拇指指尖和食指指尖的位置,通过计算两个指尖之间的距离来判断是否做出了捏合动作。当两根手指靠近到一定程度时,就认为用户进行了捏合,并调用 pyautogui.click() 执行鼠标左键点击。
为了避免手指一直保持捏合状态时连续触发点击,程序还增加了 is_pinching 状态变量。只有从“没有捏合”变成“捏合”时才执行一次点击,松开手指后才能再次触发。
import cv2
import mediapipe as mp
import pyautogui
import math
# ---------------------- 初始化 MediaPipe Hands ----------------------
mp_hands = mp.solutions.hands
hands = mp_hands.Hands(
static_image_mode=False,
max_num_hands=1,
min_detection_confidence=0.7,
min_tracking_confidence=0.5
)
# 初始化绘图工具
mp_drawing = mp.solutions.drawing_utils
drawing_spec_landmark = mp_drawing.DrawingSpec(
color=(0, 255, 0),
thickness=2,
circle_radius=3
)
drawing_spec_connection = mp_drawing.DrawingSpec(
color=(255, 0, 0),
thickness=2
)
# ---------------------- 获取屏幕尺寸 ----------------------
screen_width, screen_height = pyautogui.size()
# ---------------------- 鼠标移动平滑参数 ----------------------
smooth = 0.25
smooth_x = 0
smooth_y = 0
first_move = True
# ---------------------- 点击状态 ----------------------
# 避免一次捏合连续点击
is_pinching = False
# 捏合距离阈值
pinch_threshold = 0.04
# ---------------------- 打开摄像头 ----------------------
cap = cv2.VideoCapture(0)
cap.set(cv2.CAP_PROP_FRAME_WIDTH, 1280)
cap.set(cv2.CAP_PROP_FRAME_HEIGHT, 720)
if not cap.isOpened():
print("错误:无法打开摄像头!")
exit()
print("隔空鼠标已启动")
print("食指移动:控制鼠标")
print("拇指与食指捏合:鼠标左键单击")
print("按 q 键退出")
# ---------------------- 核心追踪逻辑 ----------------------
try:
while cap.isOpened():
# ----------------------
# 读取摄像头画面
# ----------------------
ret, frame = cap.read()
if not ret:
print("警告:无法读取摄像头画面")
break
# 镜像显示
frame = cv2.flip(frame, 1)
# ----------------------
# BGR 转 RGB
# ----------------------
frame_rgb = cv2.cvtColor(
frame,
cv2.COLOR_BGR2RGB
)
frame_rgb.flags.writeable = False
# ----------------------
# 手部识别
# ----------------------
results = hands.process(frame_rgb)
frame_rgb.flags.writeable = True
# RGB 转回 BGR
frame_bgr = cv2.cvtColor(
frame_rgb,
cv2.COLOR_RGB2BGR
)
# ----------------------
# 判断是否检测到手
# ----------------------
if results.multi_hand_landmarks:
# 获取第一只手
hand_landmarks = results.multi_hand_landmarks[0]
# 绘制手部关键点和连接线
mp_drawing.draw_landmarks(
frame_bgr,
hand_landmarks,
mp_hands.HAND_CONNECTIONS,
drawing_spec_landmark,
drawing_spec_connection
)
landmarks = hand_landmarks.landmark
# ----------------------
# 获取画面尺寸
# ----------------------
height, width = frame_bgr.shape[:2]
# ----------------------
# 获取食指指尖
# ----------------------
index_finger = landmarks[
mp_hands.HandLandmark.INDEX_FINGER_TIP
]
# 将归一化坐标转换为画面像素坐标
index_x = int(index_finger.x * width)
index_y = int(index_finger.y * height)
# 在食指指尖绘制圆点
cv2.circle(
frame_bgr,
(index_x, index_y),
10,
(255, 0, 255),
-1
)
# ----------------------
# 映射到屏幕坐标
# ----------------------
target_x = int(
index_finger.x * screen_width
)
target_y = int(
index_finger.y * screen_height
)
# 限制屏幕范围
target_x = max(
0,
min(screen_width - 1, target_x)
)
target_y = max(
0,
min(screen_height - 1, target_y)
)
# ----------------------
# 平滑鼠标移动
# ----------------------
if first_move:
smooth_x = target_x
smooth_y = target_y
first_move = False
else:
smooth_x += (
target_x - smooth_x
) * smooth
smooth_y += (
target_y - smooth_y
) * smooth
# ----------------------
# 获取拇指和食指指尖
# ----------------------
thumb_tip = landmarks[
mp_hands.HandLandmark.THUMB_TIP
]
index_tip = landmarks[
mp_hands.HandLandmark.INDEX_FINGER_TIP
]
# ----------------------
# 计算两个指尖之间的距离
# ----------------------
distance = math.sqrt(
(thumb_tip.x - index_tip.x) ** 2
+ (thumb_tip.y - index_tip.y) ** 2
)
# ----------------------
# 检测捏合手势
# ----------------------
if distance < pinch_threshold:
# 捏合开始时点击一次
if not is_pinching:
pyautogui.click()
is_pinching = True
status = "CLICK"
else:
# 松开手指
is_pinching = False
status = "MOVING"
# ----------------------
# 移动鼠标
# ----------------------
pyautogui.moveTo(
int(smooth_x),
int(smooth_y),
duration=0
)
# ----------------------
# 显示当前状态
# ----------------------
cv2.putText(
frame_bgr,
status,
(20, 40),
cv2.FONT_HERSHEY_SIMPLEX,
1,
(0, 255, 0),
2
)
cv2.putText(
frame_bgr,
f"Pinch: {distance:.3f}",
(20, 80),
cv2.FONT_HERSHEY_SIMPLEX,
0.7,
(0, 255, 255),
2
)
# ----------------------
# 没有检测到手
# ----------------------
else:
is_pinching = False
first_move = True
cv2.putText(
frame_bgr,
"No hand detected",
(20, 40),
cv2.FONT_HERSHEY_SIMPLEX,
0.8,
(0, 0, 255),
2
)
# ----------------------
# 显示摄像头画面
# ----------------------
cv2.imshow(
"Air Mouse (Press Q to quit)",
frame_bgr
)
# ----------------------
# 按 q 键退出
# ----------------------
if cv2.waitKey(1) & 0xFF == ord("q"):
break
finally:
# ----------------------
# 释放资源
# ----------------------
cap.release()
cv2.destroyAllWindows()
hands.close()
print("隔空鼠标已关闭")
 0
0 0
0 0
0 qq空间
qq空间  微博
微博  复制链接
复制链接  分享
分享  本文未经作者允许授权,禁止转载
 更多相关项目
猜你喜欢
评论/提问(已发布 0 条)

 评论
评论  收藏
收藏  分享
分享  下载
下载  举报
举报  回顶部
回顶部