手把手教你用 Spring Boot 为「手迹」应用添加用户注册功能
 0
0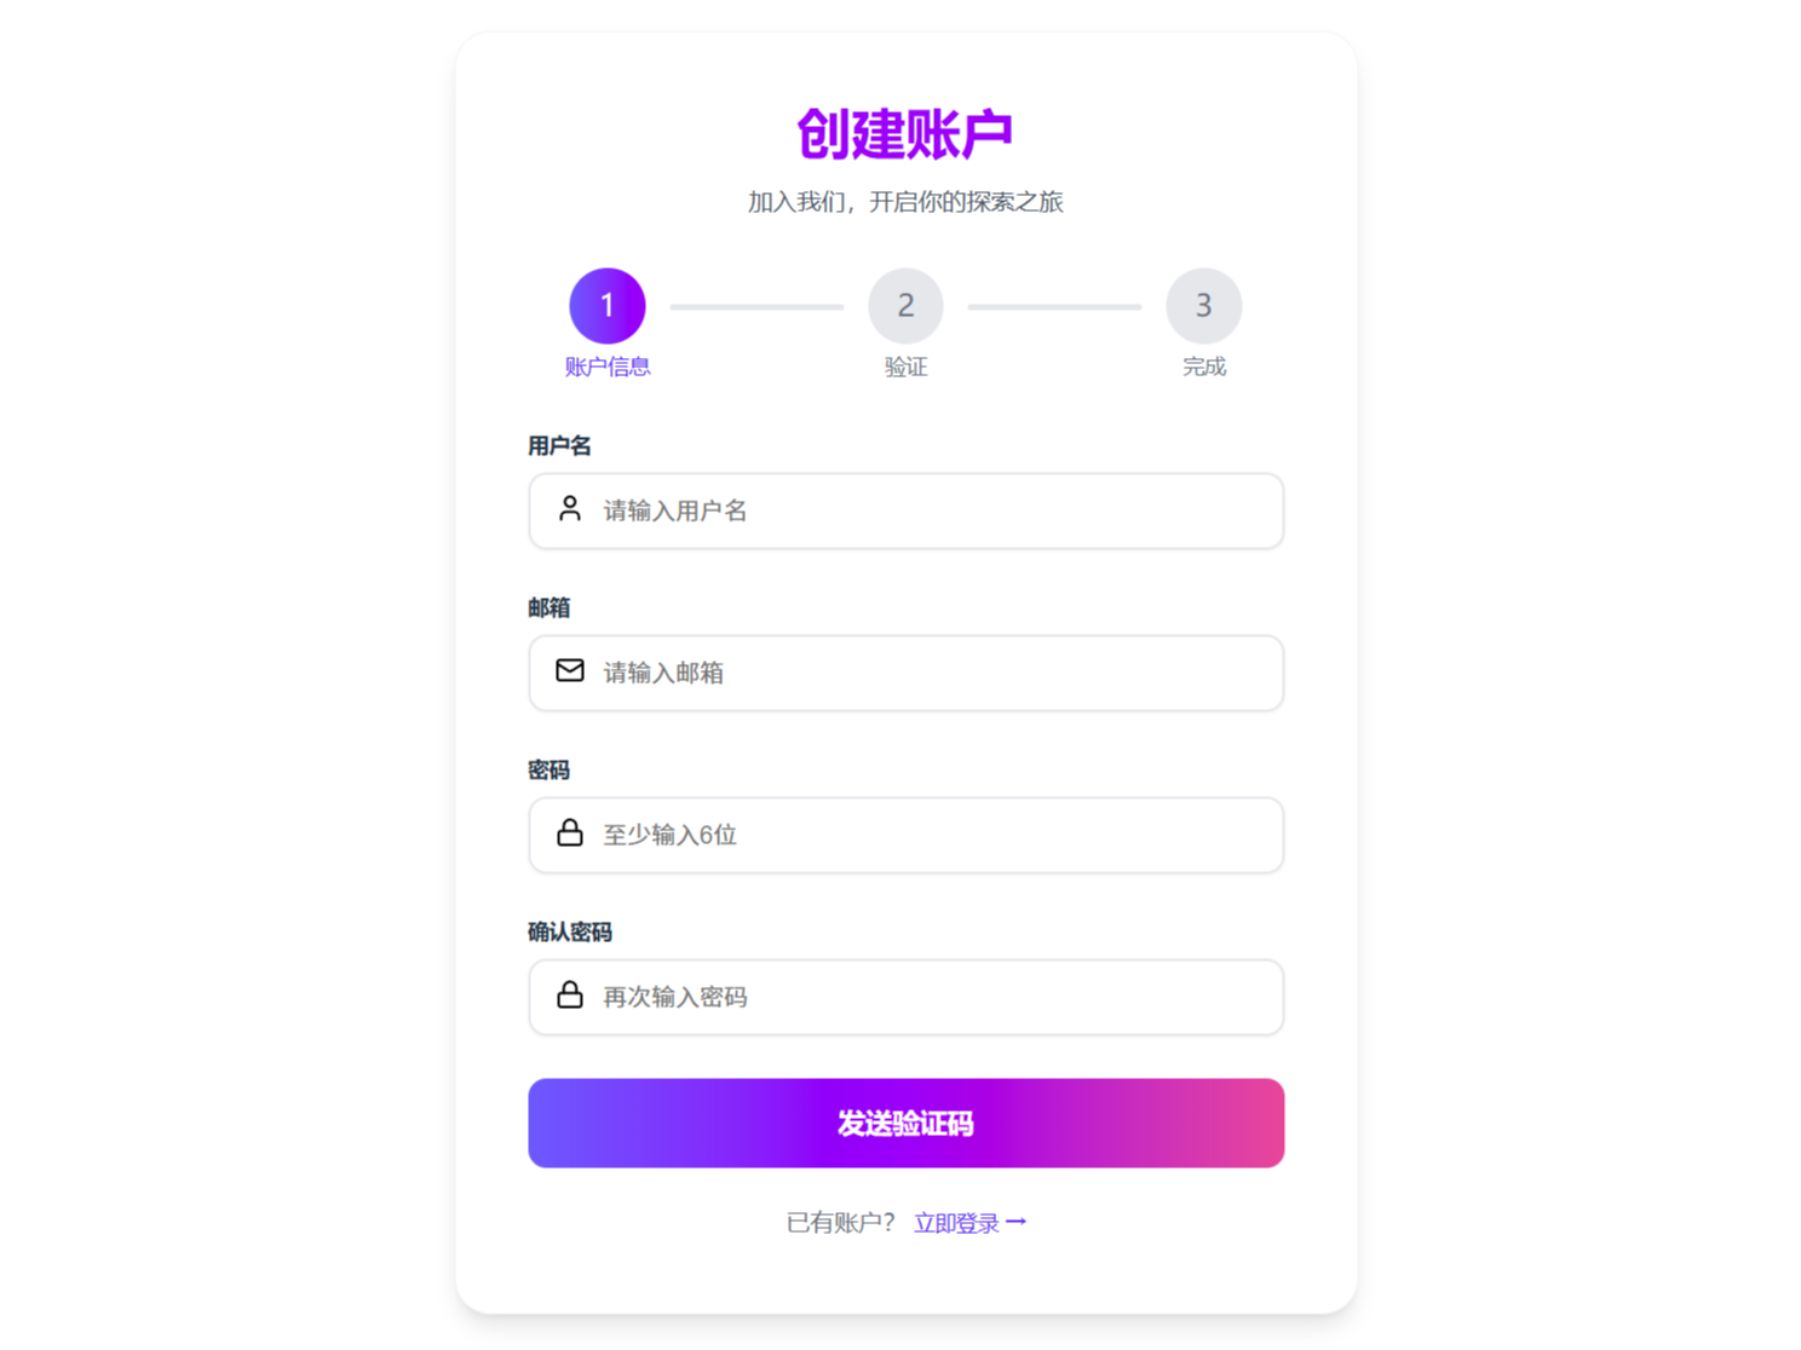
本文将手把手教你使用 Spring Boot 为「手迹」应用从零实现用户注册功能,涵盖数据库设计、密码加密、接口开发与参数校验等关键环节,代码清晰、结构完整,适合后端初学者与进阶开发者参考,助你快速构建安全可靠的注册模块。
1
验证码工具类

在公共模块下有一个utils包,这里边放了一个验证码随机生成的工具类,这个是我们接下来要注册发送的验证码。
2
邮箱功能配置


1234
在application.yaml文件中写入这些配置。这些配置用到的参数我教大家如何获取,首先进入这个网站163网易免费邮-你的专业电子邮局,在头部导航栏中找到设置->POP3/STMP/IMAP点击进入,找到POP3/STMP/IMAP这个服务并选中开启,会弹出窗口,把授权码复制一份。
3
编写邮箱服务类

在auth模块下新建cofnig->EmailService,写入以下内容
package com.handwriting.service.config;
import jakarta.annotation.Resource;
import lombok.extern.slf4j.Slf4j;
import org.springframework.beans.factory.annotation.Value;
import org.springframework.mail.SimpleMailMessage;
import org.springframework.mail.javamail.JavaMailSender;
import org.springframework.stereotype.Component;
/**
* 邮件服务类
* 提供邮件发送功能,主要用于发送验证码邮件
* 配置项(需在 application.yml 中配置):
* - spring.mail.host: SMTP 服务器地址
* - spring.mail.port: SMTP 端口
* - spring.mail.username: 发件人邮箱
* - spring.mail.password: 邮箱授权码
*
*
* @author handwriting
* @version 1.0
* @date 2026/1/6
*/
@Component
@Slf4j
public class EmailService {
@Resource
private JavaMailSender mailSender;
/**
* 发件人邮箱地址
* 从配置文件中读取
*/
@Value("${spring.mail.username}")
private String from;
/**
* 发送验证码邮件
* 发送包含验证码的简单文本邮件
*
* @param subject 邮件主题
* @param email 收件人邮箱
* @param code 验证码内容
* @return true-发送成功,false-发送失败
*/
public Boolean sendAuthCodeEmail(String subject, String email, String code) {
log.info("准备发送邮件:收件人={}, 主题={}", email, subject);
try {
// 创建邮件消息
SimpleMailMessage mailMessage = new SimpleMailMessage();
// 发件人
mailMessage.setFrom(from);
// 收件人
mailMessage.setTo(email);
// 主题
mailMessage.setSubject(subject);
// 内容(验证码)
mailMessage.setText("您的验证码是:" + code + ",有效期 5 分钟,请勿泄露给他人。");
// 发送邮件
mailSender.send(mailMessage);
log.info("邮件发送成功:{}", email);
return true;
} catch (Exception e) {
log.error("邮件发送失败:{}, 错误:{}", email, e.getMessage());
return false;
}
}
}
4
注册页面


12
这是注册主页面代码,我会把子组件放入到附件中。
层级结构为:src->view->register。
<script setup lang="ts">
import {computed, reactive, type Ref, ref} from "vue";
import type {RegisterUser} from "@/types/interface/register/RegisterUser.ts";
import CustomStepGroup from "@/components/custom/CustomSteps.vue";
import CustomStep from "@/components/custom/CustomStep.vue";
import RegisterInfoForm from "@/view/register/components/RegisterInfoForm.vue";
import RegisterAuthForm from "@/view/register/components/RegisterAuthForm.vue";
import {Step} from "@/constans/steps.ts";
import RegisterSuccess from "@/view/register/components/RegisterSuccess.vue";
// 当前进度
const active: Ref = ref(Step.INFO)
// 注册用户信息
const registerUser: RegisterUser = reactive({
username: '',
email: '',
password: '',
confirmPassword: '',
code: ''
})
// 注册用户标签
const registerUserTitle = computed(() => {
return active.value === Step.INFO ? '创建账户' : active.value === Step.AUTH ? '验证身份' : '注册成功'
})
//注册用户描述
const registerUserDescription = computed(() => {
return active.value === Step.INFO ? '加入我们,开启你的探索之旅' :
active.value === Step.AUTH ? `验证码已发送到${registerUser.email}` : '欢迎您来到手迹社区'
})
</script>
<template>
<div class="login-wrapper">
<!--头部-->
<div class="login-header-box">
<p class="login-title">{{ registerUserTitle }}</p>
<p class="login-des">{{ registerUserDescription }}</p>
</div>
<!--步骤-->
<custom-step-group v-model:active="active">
<custom-step step-des="账户信息"/>
<custom-step step-des="验证"/>
<custom-step step-des="完成"/>
</custom-step-group>
<!--注册信息-->
<register-info-form v-if="active===Step.INFO" v-model:active="active" v-model:registerUser="registerUser"/>
<!--注册验证码-->
<register-auth-form v-else-if="active===Step.AUTH" v-model:active="active" v-model:registerUser="registerUser"/>
<!--注册成功-->
<register-success v-else-if="active===Step.SUCCESS" :user-name="registerUser.username"/>
</div>
</template>
<style scoped lang="scss">
//注册容器
.login-wrapper {
margin: 0;
border-radius: 24px;
border: 1px solid rgb(243, 244, 246);
padding: 48px;
background-color: #ffffff;
box-shadow: rgba(0, 0, 0, 0) 0 0 0 0, rgba(0, 0, 0, 0) 0 0 0 0, rgba(0, 0, 0, 0.1) 0 10px 15px -3px, rgba(0, 0, 0, 0.1) 0px 4px 6px -4px;
width: 500px;
}
// 创建头部容器
.login-header-box {
margin-bottom: 32px
}
// 标题
.login-title {
font-size: 36px;
font-weight: 700;
line-height: 36px;
color: #9810fa;
margin-bottom: 16px;
}
// 描述
.login-des {
font-weight: 400;
font-size: 16px;
line-height: 24px;
color: #4a5565;
}
</style>
CountDown.vue
1.71KB
RegisterAuthForm.vue
2.31KB
RegisterFooter.vue
634B
RegisterSuccess.vue
2.73KB
RegisterInfoForm.vue
4.38KB
5
发送邮件功能Controller-后端部分

在注册的首页面注册信息填写完成之后,会给后端发送一个请求。
package com.handwriting.controller.auth;
import com.handwriting.enums.ResultCode;
import com.handwriting.result.R;
import com.handwriting.service.CaptchaService;
import jakarta.annotation.Resource;
import lombok.extern.slf4j.Slf4j;
import org.springframework.web.bind.annotation.*;
/**
* @author 26234
* @version 1.0
* @date 2026/1/6 18:05
* @description: 验证码
*/
@RestController
@RequestMapping("/captcha")
@Slf4j
public class CaptchaController {
@Resource
CaptchaService captchaService;
@PostMapping("/sendCode")
public R<String> sendCode(@RequestParam("email") String email) {
return captchaService.sendCode(email) ? R.success() : R.error(500, "邮件已存在或者发送失败");
}
@GetMapping("/verifyCode")
public R<String> verifyCode(@RequestParam("mail") String mail, @RequestParam("code") String code) {
return captchaService.verifyCode(code, mail) ? R.success() : R.error(500, "验证码错误或已失效");
}
}
6
邮箱service层-验证登录具体实现

这是邮箱登录具体实现的逻辑。
package com.handwriting.service.impl;
import com.handwriting.service.CaptchaService;
import com.handwriting.config.EmailService;
import com.handwriting.utils.CaptchaUtils;
import com.handwriting.utils.RedisUtils;
import jakarta.annotation.Resource;
import lombok.extern.slf4j.Slf4j;
import org.springframework.stereotype.Service;
import java.util.concurrent.TimeUnit;
/**
* 验证码服务实现类
* 提供邮箱验证码的发送和验证功能
* 工作流程:
* 1. 生成 6 位随机数字验证码
* 2. 通过邮件发送验证码
* 3. 将验证码存入 Redis(5 分钟有效期)
* 4. 验证时比对 Redis 中的验证码
*
*
* @author handwriting
* @version 1.0
* @date 2026/1/7
*/
@Service
@Slf4j
public class CaptchaServiceImpl implements CaptchaService {
@Resource
private RedisUtils redisUtils;
@Resource
private EmailService emailService;
/**
* 发送邮箱验证码
* 生成 6 位随机验证码并发送到指定邮箱
*
* @param email 接收验证码的邮箱地址
* @return true-发送成功,false-发送失败或验证码已存在
*/
@Override
public Boolean sendCode(String email) {
log.info("准备发送验证码到邮箱:{}", email);
// 检查是否已存在未过期的验证码
Boolean hasKey = redisUtils.hasKey(email);
if (hasKey) {
log.warn("验证码已存在,请勿重复发送:{}", email);
return false;
}
// 生成 6 位随机验证码
String code = CaptchaUtils.generateCaptcha();
// 发送邮件
Boolean sendMail = emailService.sendAuthCodeEmail("账号验证", email, code);
if (sendMail) {
// 将验证码存入 Redis,有效期 5 分钟
redisUtils.set(email, code, 5, TimeUnit.MINUTES);
log.info("验证码发送成功:{}", email);
return true;
}
log.error("验证码发送失败:{}", email);
return false;
}
/**
* 验证邮箱验证码
* 比对用户输入的验证码与 Redis 中存储的是否一致
*
* @param code 用户输入的验证码
* @param mail 邮箱地址
* @return true-验证成功,false-验证失败或验证码已过期
*/
@Override
public Boolean verifyCode(String code, String mail) {
log.info("验证邮箱验证码:{}", mail);
// 检查验证码是否存在(是否过期)
Boolean hasKey = redisUtils.hasKey(mail);
if (!hasKey) {
log.warn("验证码已过期或不存在:{}", mail);
return false;
}
// 获取 Redis 中存储的验证码
String mailCode = redisUtils.get(mail).toString();
// 比对验证码
if (code.equals(mailCode)) {
// 验证成功后删除验证码(防止重复使用)
redisUtils.delete(mail);
log.info("验证码验证成功:{}", mail);
return true;
} else {
log.warn("验证码错误:{}", mail);
return false;
}
}
}
7
完成注册


12
在邮件中查看验证码并输入,完成用户的注册。
8
注册用户入口Controller

在web模块下的UserController文件内写入新的代码,用于接收前端发来的注册请求。
/**
* 用户注册接口
* 注册新用户,需要邮箱验证码
*
* @param userDto 用户注册信息(用户名 + 邮箱 + 密码 + 验证码)
* @return 注册结果
*/
@PostMapping("/register/user")
public R<String> userRegister(@Valid @RequestBody UserDto userDto) {
log.info("用户注册请求:{}", userDto.getEmail());
// 1. 检查用户是否已存在
Boolean isExist = userService.getUserInfo(userDto);
if (!isExist) {
return R.error(500, "用户已注册");
}
// 2. 注册用户
Boolean isAddUser = userService.insertUser(userDto);
return isAddUser ? R.success("注册成功") : R.error(500, "添加失败,请重试");
}
9
注册用户实现Service

@Override
public Boolean insertUser(UserDto userDto) {
log.info("插入新用户:{}", userDto.getEmail());
User userInfo = new User();
BeanUtils.copyProperties(userDto, userInfo);
// 密码加密存储
userInfo.setPassword(passwordEncoder.encode(userDto.getPassword()));
return userMapper.insert(userInfo) == 1;
}
@Override
public Boolean getUserExits(String info) {
log.info("检查用户是否存在:{}", info);
// 支持通过用户名或邮箱查询
LambdaQueryWrapper<User> queryWrapper = new LambdaQueryWrapper<>();
queryWrapper.eq(User::getEmail, info)
.or()
.eq(User::getUsername, info);
return userMapper.exists(queryWrapper);
}
10
完整代码
handwriting-后端.zip
345.56KB
handwriting-vue.zip
56.83MB
 0
0 0
0 0
0 qq空间
qq空间  微博
微博  复制链接
复制链接 更多相关项目
猜你喜欢
评论/提问(已发布 0 条)