ESP32 Wi-Fi遥控小车教程:网页控制直流电机
 0
0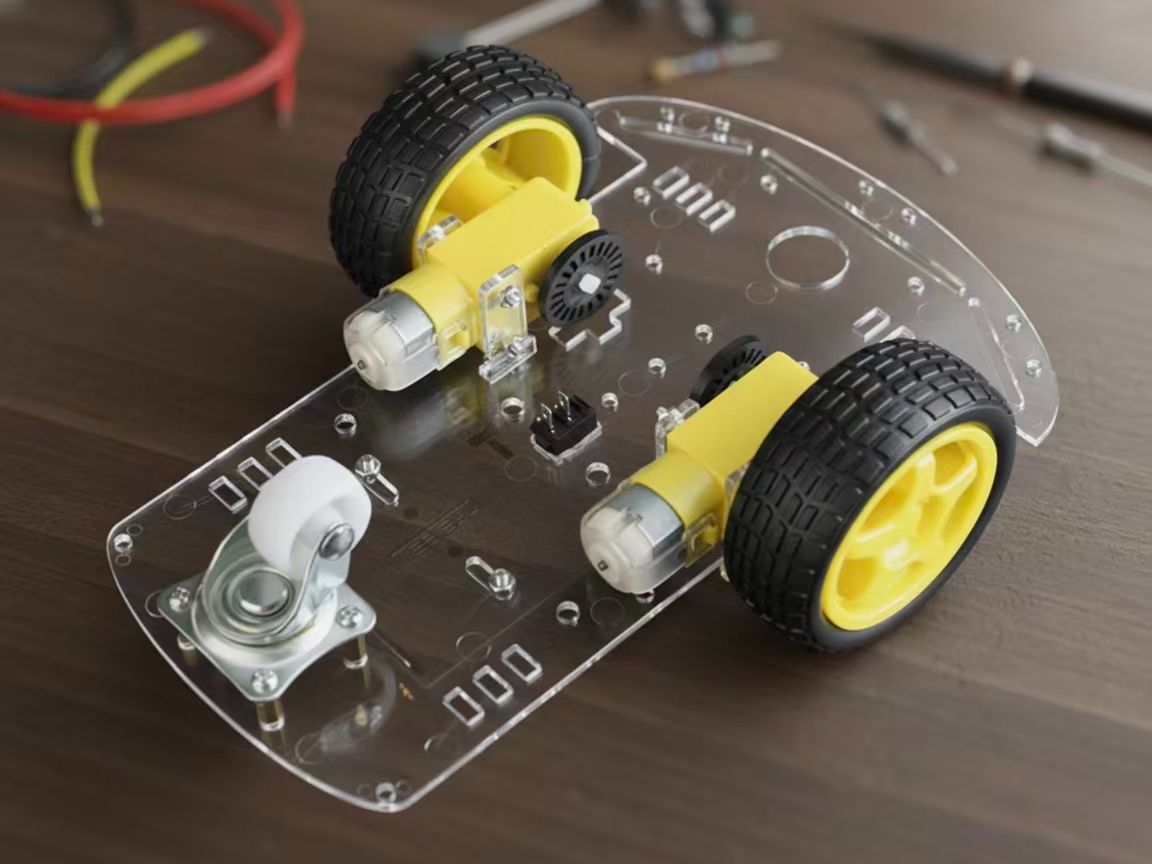
在这个项目里,我们会讲怎么用 ESP32 做一个能用 Wi-Fi 遥控的小车。整个项目分成两部分:第一部分是搞清楚怎么用 ESP32 控制直流电机,顺便把电路搭起来;第二部分就是写个 Web 服务器的程序,让你能在浏览器里点点按钮,就能控制小车动起来。
1
实现代码

#include <WiFi.h>
// 创建 Web 服务器,监听 80 端口
WiFiServer server(80);
// 存储 HTTP 请求头
String header;
// 电机 1 引脚定义
const int motor1Pin1 = 27;
const int motor1Pin2 = 26;
const int enable1Pin = 14;
// 电机 2 引脚定义
const int motor2Pin1 = 33;
const int motor2Pin2 = 25;
const int enable2Pin = 32;
// PWM 配置
const int pwmFreq = 30000; // 30kHz
const int pwmResolution = 8; // 8 位分辨率 (0~255)
const int motorChannel1 = 0; // LEDC 通道 0 给电机1
const int motorChannel2 = 1; // LEDC 通道 1 给电机2
int currentDutyCycle = 0; // 当前占空比 (0~255)
// 全局变量:当前电机速度(0~100)
int motorSpeedPercent = 0;
// 超时设置(毫秒)
const long timeoutTime = 60000;
void setup() {
Serial.begin(115200);
// ==================== Wi-Fi 自动连接 + SmartConfig ====================
if (WiFi.status() != WL_CONNECTED) {
WiFi.begin(); // 尝试连接已保存的网络
Serial.println("尝试连接已保存的 Wi-Fi...");
int attempts = 0;
while (WiFi.status() != WL_CONNECTED && attempts < 20) {
delay(500);
Serial.print(".");
attempts++;
}
}
// 若仍未连接,启动 SmartConfig
if (WiFi.status() != WL_CONNECTED) {
Serial.println("\n启动 SmartConfig...");
WiFi.beginSmartConfig();
while (!WiFi.smartConfigDone()) {
delay(500);
Serial.print(".");
}
Serial.println("\nSmartConfig 配置成功!");
}
// 等待最终连接
while (WiFi.status() != WL_CONNECTED) {
delay(500);
Serial.print(".");
}
Serial.println("\nWi-Fi 已连接!");
Serial.print("IP 地址: ");
Serial.println(WiFi.localIP());
// ==================== 电机引脚初始化 ====================
pinMode(motor1Pin1, OUTPUT);
pinMode(motor1Pin2, OUTPUT);
pinMode(motor2Pin1, OUTPUT);
pinMode(motor2Pin2, OUTPUT);
// 初始化 PWM 通道
ledcSetup(motorChannel1, pwmFreq, pwmResolution);
ledcSetup(motorChannel2, pwmFreq, pwmResolution);
ledcAttachPin(enable1Pin, motorChannel1);
ledcAttachPin(enable2Pin, motorChannel2);
// 初始电机停止
stopMotors();
// 启动 Web 服务器
server.begin();
}
// 停止所有电机
void stopMotors() {
digitalWrite(motor1Pin1, LOW);
digitalWrite(motor1Pin2, LOW);
digitalWrite(motor2Pin1, LOW);
digitalWrite(motor2Pin2, LOW);
ledcWrite(motorChannel1, 0);
ledcWrite(motorChannel2, 0);
currentDutyCycle = 0;
motorSpeedPercent = 0;
}
// 设置电机方向和速度
void setMotorDirection(int dir) {
// dir: 0=stop, 1=forward, 2=left, 3=right, 4=reverse
switch (dir) {
case 1: // 前进
digitalWrite(motor1Pin1, LOW); digitalWrite(motor1Pin2, HIGH);
digitalWrite(motor2Pin1, LOW); digitalWrite(motor2Pin2, HIGH);
break;
case 2: // 左转(左轮停,右轮转)
digitalWrite(motor1Pin1, LOW); digitalWrite(motor1Pin2, LOW);
digitalWrite(motor2Pin1, LOW); digitalWrite(motor2Pin2, HIGH);
break;
case 3: // 右转(右轮停,左轮转)
digitalWrite(motor1Pin1, LOW); digitalWrite(motor1Pin2, HIGH);
digitalWrite(motor2Pin1, LOW); digitalWrite(motor2Pin2, LOW);
break;
case 4: // 后退
digitalWrite(motor1Pin1, HIGH); digitalWrite(motor1Pin2, LOW);
digitalWrite(motor2Pin1, HIGH); digitalWrite(motor2Pin2, LOW);
break;
default: // 停止
stopMotors();
return;
}
// 应用当前速度(如果速度为0,则实际也停止)
if (motorSpeedPercent > 0) {
int duty = map(motorSpeedPercent, 0, 100, 0, 255);
ledcWrite(motorChannel1, duty);
ledcWrite(motorChannel2, duty);
currentDutyCycle = duty;
} else {
stopMotors();
}
}
void loop() {
WiFiClient client = server.available();
if (!client) return;
Serial.println("新客户端连接。");
header = "";
unsigned long startTime = millis();
// 读取 HTTP 请求头(直到空行或超时)
while (client.connected()) {
if (millis() - startTime > timeoutTime) break;
if (!client.available()) continue;
char c = client.read();
header += c;
if (c == '\n') {
// 检查是否到达请求末尾(空行)
if (header.endsWith("\r\n\r\n")) break;
}
}
// ==================== 解析 GET 请求 ====================
int command = 0; // 0=none, 1=forward, 2=left, 3=right, 4=reverse, 5=stop, 6=speed
int newSpeed = -1;
if (header.indexOf("GET /forward") >= 0) {
command = 1;
} else if (header.indexOf("GET /left") >= 0) {
command = 2;
} else if (header.indexOf("GET /right") >= 0) {
command = 3;
} else if (header.indexOf("GET /reverse") >= 0) {
command = 4;
} else if (header.indexOf("GET /stop") >= 0) {
command = 5;
} else if (header.indexOf("GET /?value=") >= 0) {
command = 6;
int pos1 = header.indexOf('=');
int pos2 = header.indexOf('&', pos1);
if (pos2 == -1) pos2 = header.indexOf(' ', pos1); // 兼容无 & 的情况
if (pos1 > 0 && pos2 > pos1) {
String valueStr = header.substring(pos1 + 1, pos2);
newSpeed = valueStr.toInt();
newSpeed = constrain(newSpeed, 0, 100);
}
}
// 执行命令
if (command == 5) {
stopMotors();
Serial.println("执行:停止");
} else if (command == 6 && newSpeed >= 0) {
motorSpeedPercent = newSpeed;
if (motorSpeedPercent == 0) {
stopMotors();
} else {
int duty = map(motorSpeedPercent, 0, 100, 0, 255);
ledcWrite(motorChannel1, duty);
ledcWrite(motorChannel2, duty);
currentDutyCycle = duty;
}
Serial.println("设置速度: " + String(motorSpeedPercent) + "%");
} else if (command >= 1 && command <= 4) {
setMotorDirection(command);
const char* dirs[] = {"", "前进", "左转", "右转", "后退"};
Serial.println("执行:" + String(dirs[command]));
}
// ==================== 发送 HTML 响应 ====================
client.println("HTTP/1.1 200 OK");
client.println("Content-Type: text/html; charset=UTF-8");
client.println("Connection: close");
client.println(); // 空行表示头部结束
client.println("<!DOCTYPE html>");
client.println("<html>");
client.println("<head>");
client.println(" <meta name=\"viewport\" content=\"width=device-width, initial-scale=1\">");
client.println(" <meta charset=\"UTF-8\">");
client.println(" <title>ESP32 电机控制</title>");
client.println(" <style>");
client.println(" body { font-family: Arial, sans-serif; text-align: center; margin-top: 30px; }");
client.println(" .btn { background-color: #4CAF50; border: none; color: white; padding: 15px 32px;");
client.println(" text-align: center; text-decoration: none; display: inline-block;");
client.println(" font-size: 18px; margin: 8px; cursor: pointer; border-radius: 8px; }");
client.println(" .btn-stop { background-color: #f44336; }");
client.println(" input[type='range'] { width: 80%; margin: 20px 0; }");
client.println(" </style>");
client.println("</head>");
client.println("<body>");
client.println(" <h2>ESP32 电机远程控制</h2>");
client.println(" <p><button class=\"btn\" onclick=\"sendCmd('/forward')\">前进</button></p>");
client.println(" <p>");
client.println(" <button class=\"btn\" onclick=\"sendCmd('/left')\">左转</button>");
client.println(" <button class=\"btn btn-stop\" onclick=\"sendCmd('/stop')\">停止</button>");
client.println(" <button class=\"btn\" onclick=\"sendCmd('/right')\">右转</button>");
client.println(" </p>");
client.println(" <p><button class=\"btn\" onclick=\"sendCmd('/reverse')\">后退</button></p>");
client.println(" <p>电机速度: <span id=\"speedValue\">" + String(motorSpeedPercent) + "</span>%</p>");
client.println(" <input type=\"range\" id=\"speedSlider\" min=\"0\" max=\"100\" value=\"" + String(motorSpeedPercent) + "\" oninput=\"updateSpeed(this.value)\">");
client.println(" <script>");
client.println(" function sendCmd(path) {");
client.println(" fetch(path).catch(e => console.log('请求失败'));");
client.println(" }");
client.println(" function updateSpeed(value) {");
client.println(" document.getElementById('speedValue').textContent = value;");
client.println(" fetch('/?value=' + value).catch(e => console.log('调速失败'));");
client.println(" }");
client.println(" </script>");
client.println("</body>");
client.println("</html>");
// 关闭连接
client.stop();
Serial.println("客户端断开连接。\n");
}
2
材料


1234
V需要准备以下的零件:
- ESP32开发板
- L298N电机驱动
- 9V电池
- 小车底盘套件
- 杜邦线
3
方向控制


12
在网页端输入IP地址后,就会弹出一个控制页面,像下面这张图那样。你可以直接点按钮来控制小车动起来,比如前进、后退、左转、右转,还有停止。
速度是用一个滑块调的,不过不是连续调的,就分了5档:0、25%、50%、75%、100%。虽然说是滑块,但其实拖到中间位置它也会自动对齐到这五个值之一,所以用起来还挺方便的。
点一下哪个方向,小车就马上执行,速度就按当前滑块选的那档来跑。
4
电路图

电路接线其实挺简单的,照着图连就行。
这里得用两个电源,主要是因为电机那块儿电流太大了,要是跟ESP32共用一个电源的话,很容易把ESP32搞不稳定,甚至重启啥的。所以干脆分开供电——一个给ESP32开发板,另一个专门给L298N驱动和电机用。不过图里好像没画出ESP32的电源部分,自己记得加上哈。
这个项目用的是L298N驱动模块,网上关于这玩意儿的资料一大堆,我就不再啰嗦了,免得重复造轮子。
重点注意一下:两个电源、L298N还有ESP32的地(GND)必须接到一块儿,也就是共地,不然整个系统可能根本跑不起来。这点特别容易忽略,但真的很重要。
 0
0 0
0 0
0 qq空间
qq空间  微博
微博  复制链接
复制链接 更多相关项目
猜你喜欢
评论/提问(已发布 0 条)